|
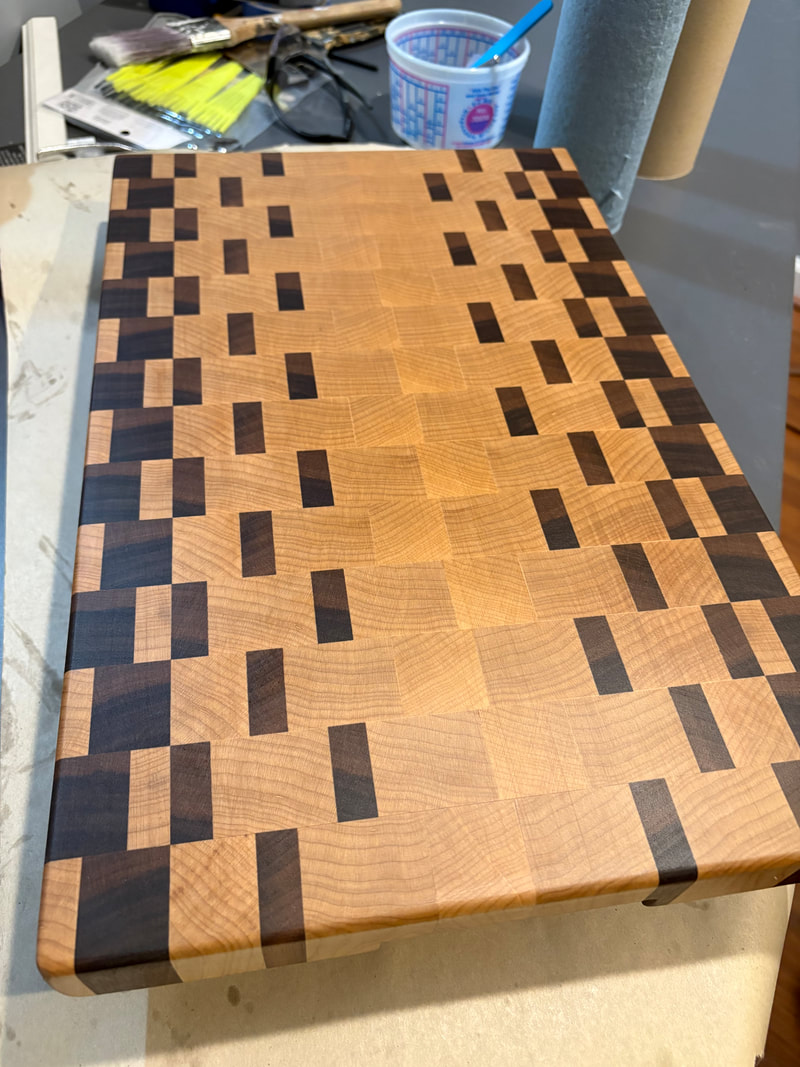
Finally started making some end grain cutting boards. Why "End Grain"... they are so cool and functional. Cool... Search for these on the internet and be ready to be dazzled with the design possibilities. I went to www.cuttingboarddesigner.com to find step by step instructions. The board i chose was called "Fade" using maple and walnut. I started with 2" thick wood and flattened and planned to 1.5". 1) First glue up was alternating strips using a pattern suggested by the web site. 2) Then i cut that glue up into 1.7" strips going cross pattern. 3) Lay the pattern out ... flip every other piece... then turn them grain up. 4) Glue up again. This was a challenge as i was working with 15 pieces in my design and had to keep those straight and level. A little off on this step as my clamps were a little off but I had some wiggle room that i allotted for in the 1.7" 5) Sand Sand Sand. I have a drum sander which was so helpful. Most people recommend against using a planner at this point as the end grain is difficult to cut on a planner. Did i mention that you should water pop. 6) Lots of cutting board oil. I use Real Milk Paint brand of cutting board oil. Manufactured in Tennessee using food and allergy safe walnut oil. 2-3 coats due to soak in then a coat of wood wax also food safe.
0 Comments
Leave a Reply. |
AuthorDr Steve Passmore is a local craftsman and publisher of this web site. Archives
December 2025
Categories |


 RSS Feed